http://www.yourtechtamer.com/blog/2011/10/want-to-set-up-word-with-your-default-fonts-and-settings/
Ah…Microsoft Office…love it or hate it, for many of us, it is a way of life. Part of that life, of course, includes Microsoft Word for all things document or, ahem, ‘word’ related (sorry, I saw the pun coming off of my fingers as I began typing and just had to leave it in there). Unfortunately, the ‘look and feel’ that I like in my documents may be very different than the look that you prefer in yours, but unless we take the time to change the well-hidden defaults in Word (Microsoft Word, that is), we find ourselves having to format and reformat with every document.
Alas, I FINALLY found where one goes to change the default font, line-spacing, paragraphing, etc. thanks to a small blurb in PC World Magazine (I give full credit to Christopher Null, though I’ve added some screenshots to help clarify). For those of you who have been looking to change the defaults (and I know that there are some out there because we’ve talked about it) take heart – this only takes a minute – and that minute will be the LAST TIME you have to format the base Word document to your liking :-)!
By the way, that ‘default’ style in Word is called the ‘Normal Style’…just to add confusion to confusion!
Open up a blank Word document and begin typing some text. Type a chunk of text that will include paragraphing, alignment, carriage returns, etc. The basics of a Word document for you.

Above is the "Normal" font for Microsoft Word
Now, change this default font to the font you want as the ‘default’ (or ‘Normal’ as Microsoft defines it):

Above is the altered text to 'my' style for Word
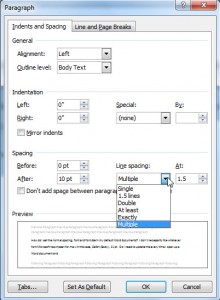
If you want to adjust the paragraph style, line spacing, etc. (in other words, more than just the font and/or font size), select some text within the document you are creating, and right-click on it. Choose ‘Paragraph’. It will bring up this screen:

Make any adjustments to the paragraphing, line spacing, etc. Note: There are two tabs on this screen…play with all the settings and find the ones that you want. The screens are similar in both Office 2003, 2007 and 2010 – not exactly, but similar.
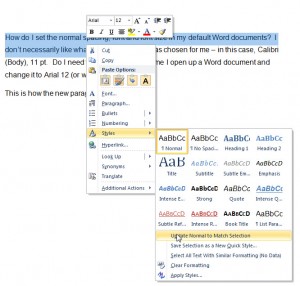
Now, select some of the text. In 2007 or later, you’ll right-click and select ‘Styles’ (the screens I’ll show are from Office 2010) [In 2003, you’ll right-click and select ‘Font’, then click ‘Default’]. Now, click on ‘Update Normal to Match Selections’:

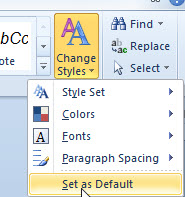
If you want this set of selections to be PERMANENT when you open up a new document, go to the Word ribbon, and select ‘Change Styles’, then ‘Set as Default’ (at the bottom of the list):

Now, close this document. Open a new document and begin typing. Voila!!!

Your new ‘normal’ is defined as the baseline!


